Now we are learning about .get func ,.set() and entry funcreading/writing files wit python
Entry to take input from user
To use it typeguys this is my youtube channel linkclick hereand here you will get all code on googledrive click here
from tkinter import *
from tkinter import messagebox as msg
root=Tk()
root.title("Dream")
root.geometry("1500x700+0+0")
v1=Entry(root).pack() this is entry widget.get function use to get data of entry
def got():
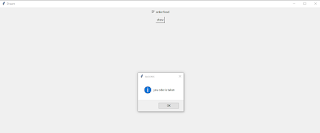
msg.showinfo("you type",f"you type {vv.get()}") #it get data fromentry field and show in messagebox
vv=StringVar() *this is variable
v1=Entry(root,textvariable=vv).pack()
v2=Button(root,text="show",command=got).pack() *this is button and wename it show and add a command to it.set function use to set data in entry fielddef got():
if vv.get()== "open":
vv2.set("you write good") *if the data fromelse:v1 entry is same to open it show you write good in v2entry
vv2.set("wrong, we are not happy") *if the data fromv1 entry is not same to open it show wrong, we are not happy in v2entrylearn about get in radio and check button, reading and writing a file use .get() func. with check box write like this from tkinter import * from tkinter import messagebox as msg root = Tk() def got(): if vv4.get() == 1: msg.showinfo("success","you oder is taken") else: msg.showinfo("thanks","thanks for using our servise") vv4 = IntVar() root.title("Dream") root.geometry("1500x700+0+0") v4 = Checkbutton(root, text="order food",variable=vv4, onvalue=1, offvalue=0,height=2, width=10).pack() # onvalue=1 mean when checkbox is check the value is 1 else 0 .. we use variable to define var in check box v3 = Button(root, text="show", command=got).pack() root.mainloop()
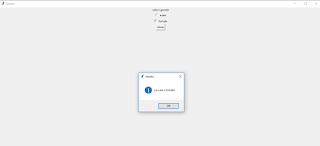
use .get() func. with radio box write like thisfrom tkinter import * from tkinter import messagebox as msg root = Tk() def got(): if vv4.get() == 1: msg.showinfo("thanks","you are a male") elif vv4.get() == 2: msg.showinfo("thanks","you are a female") else: msg.showerror("error", "select gender") vv4 = IntVar() root.title("Dream") root.geometry("1500x700+0+0") Label(root,text="select gender").pack() v4 = Radiobutton(root,text="male",variable=vv4,value=1).pack() *value must be different v5 = Radiobutton(root,text="female",variable=vv4,value=2).pack() v3 = Button(root, text="show", command=got).pack() root.mainloop()
use of try and except try: #when try get error it run except except #error name: what you want to run when error comes to read line in python write like this f = open('pac.txt') #the name of file with full extension # read first line data = f.readline() print(data) # Read second line data = f.readline() print(data) # Read third line data = f.readline() print(data) # Read fourth line. and so on.. data = f.readline() print(data) f.close() #output my youtube channel is code with rehaan handling error while reading file def readFile(filename): try: #try will all ways exicute with open(filename, "r") as f: print(f.read()) except FileNotFoundError: # except exicute when it get an error like"FileNotFoundError","ValueError" etc print(f"File {filename} is not found") readFile("1.txt") readFile("2.txt") readFile("3.txt") # output is thanks File 2.txt is not found write into a file filename = "sample.txt" #name of file with open(filename, "w") as f: f.write("here the content come whis you want to write") like nam=input("write file name with extwnsion .txt: ") # first it will take name of file like I type code.txt filename=nam with open(filename, "w") as f: var=input("write message : ") # Then it will take msg witch you want to store in that file f.writelines(var) ####### this will I discuss on my youtube channel ######### to be continue(making a login system, etc)
Call botsa , b , c , d
Sunday, 18 December 2022
Use of Entry , .get() , .set(), reading and writing data , entry in python
Basic Styling in Tkinter
today topic is styling in tkinter
Whole thing in a video
styling is a basic and important roll in tkinter
first make a label or button
i will make a label name m
m=Label(root,text="hi",background="green").place(x=66,y=44) -
background="colour you want" this wil clange label background colour to green
you can use bg as background
m=Label(root,text="hi",foreground="green").place(x=66,y=44) -
foreground="colour you want" this wil clange label foreground colour to green
you can use fg as foreground
m=Label(root,text="hi",bg="green",borderwidth="59",font="helvetica 40 bold").place(x=66,y=44) -
font is property controler of label, button etc like font ="style,size,bold or not or bold italic "
other types of font style like
Times,Timesnewroman etc
use of relief
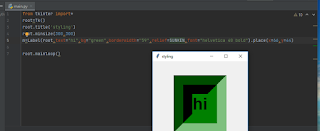
m=Label(root,text="hi",bg="green",borderwidth="59",relief=RAISED).place(x=66,y=44) -
relief="your style"
note* always relief style name capital like SUNKEN this is correct , SUNken THIs is wrong
In last I explain about full use of .pack() , .grid() , .place() extension
like in grid we can use pady, padx ,ipady ,ipadx this are literally use in styling like
i will make a awesome button
m=Button(root,text="hi",bg="green",borderwidth="10",relief=GROOVE,font="Times 15 bold italic").pack(pady=20,ipady=4,ipadx=20)
now we use some types of relief in this button
m=Button(root,text="hi",bg="green",borderwidth="10",relief=FLAT,font="Times 15 bold italic").pack(pady=20,ipady=4,ipadx=20)
m=Button(root,text="hi",bg="green",borderwidth="10",relief=SUNKEN,font="Times 15 bold italic").pack(pady=20,ipady=4,ipadx=20)
m=Button(root,text="hi",bg="green",borderwidth="10",relief=RAISED,font="Times 15 bold italic").pack(pady=20,ipady=4,ipadx=20)
m=Button(root,text="hi",bg="green",borderwidth="10",relief=RIDGE,font="Times 15 bold italic").pack(pady=20,ipady=4,ipadx=20)
to be continue....(reading data from buttons)
python tkinter basic tools
Tkinter tools - there are many tools in tkinter like messagebox,check button,radio button,frame,label,adding image to button with imagetk etc.
and we learn adding command with a button
Using messagebox in tkinter window
TYPE
note first of all we will import a package name massagebox
How to import - Type at upper like this -
from tkinter import messagebox as msg - as msg now we can use messagebox as msg like
type at lower-
note there are many messagebox function like- msg.showinfo(),msg.showwarning(),
showerror(), askokcancel(), askyesno(), askyesnocancel(),
askquestion() and askretrycancel() now see use of all and how it looks
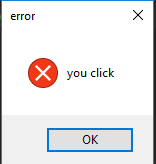
msg.showinfo("error","you click the button") - ("title","message you want to show")
msg.showwarning("error","you click the button") - ("title","message you want to show")
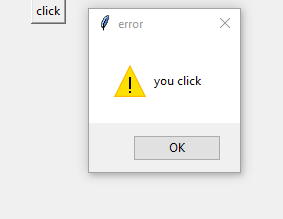
msg.showerror("error","you click the button") - ("title","message you want to show")
msg.askokcancel("error","you click the button") - ("title","message you want to show")
msg.askyesno("error","you click the button") - ("title","message you want to show")
msg.askyesnocancel("error","you click the button") - ("title","message you want to show")
msg.askquestion("error","you click the button") - ("title","message you want to show")
Thursday, 7 January 2021
python tkinter basic tools part2
This is tkinter basic tools part2. In this we learn about adding jpeg images, basic use of .pack() etc.
Adding jpeg in button
TYPE this at upper
from PIL import Image,ImageTk - this import jpeg format allow
Type this in code-
photo = PhotoImage(file="hu.png") - photo is name of it like a variable PhotoImage is function(file="your full file name")
mango = ImageTk.PhotoImage(photo) - mango is name of variable ImageTK.PhotoImage is function to allow jpeg(your photo image
variable)
make a button -
btn=Button(root,image=mango).pack() - Button is function (where you want to place,image=your ImageTK variable)
Full use of .pack()
these is some of them -
-anchor, -fill, -ipadx, -ipady, -padx, -pady, or -side etc
side will set side - like left,rigth,top,bottom
type for side left -
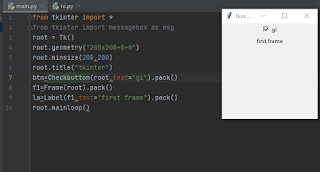
la=Label(f1,text="first frame").pack(side=LEFT)
type for side right -
la=Label(f1,text="first frame").pack(side=RIGHT)
type for side top -
la=Label(f1,text="first frame").pack(side=TOP)
type for side bottom -
la=Label(f1,text="first frame").pack(side=BOTTOM)
use of pady - this set pading from x,y axis
btn=Button(root,image=photo).pack(pady=20) - set padding from y axis (pady=set number)
button with payding 9
button with payding 20
use of padx
btn=Button(root,image=photo).pack(padx=20) - set padding from x axis (pady=set number)
use of fill - this fill from x or y and both axis
btn=Button(root,image=photo).pack(fill="x")
btn=Button(root,image=photo).pack(fill="y")
use of anchor - we can set label or anything to all direction
these are sides of anchor
n, ne, e, se, s, sw, w, nw, or center
la=Label(f1,text="first frame").pack(anchor="w")
use of ipady - this set inner pading from y axis
btn=Button(root,image=photo).pack(ipady="40")
use of ipadx - this set inner pading from x axis
btn=Button(root,image=photo).pack(ipadx="40")
use of .grid()
we can use all this -anchor, -fill, -ipadx, -ipady, -padx, -pady, or -side tools in it
use of row column in grid
la=Label(root,text="first frame").grid(row=5,column=4) - la is name of label(where you want to place,text="you want").grid(row=row number,column=column number)
use of .place()
la=Label(f1,text="first frame").place(x=30,y=400) - la is name of label(where you want to place,text="you want").place(x=your x position,y=your y position)
Adding command with button
make a button
btn=Button(root,text="press me",command=hi).grid()
when button click command
hi will execute
type upper from button line
def hi(): - def is function hi() is function name : is end for function
msg.showinfo("hi","smile")
to be continued...(Readind data,styling etc. )
-
Monday, 4 January 2021
Python tkinter basic
and make a new file name main.py, Start typing
Changing title of tkinter window -
 TYPE
root.title("tkinter") -
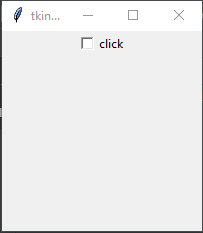
("type your title here")Using minsize and maxsize root.minisize(200,200) - ("width" ,"length") -this will setthe minimum size of window, windowsize dose not get smaller than thissize root.maxsize(1300,600) -("width" , "length") -this will set the maximum size ofwindow, window size dose not getlarger than this sizeMaking button Button name likebtn=Button(root,text="click") - Button thisis thinter function that define we are making a button (where you want to place,text is used to put text on button) and to see button in tkinter window we will to pack button there are two method to pack1. button name.pack() - btn.pack() 2. btn=Button(root,text="click").pack()
to be continued...(about tools)
Use of Entry , .get() , .set(), reading and writing data , entry in python
Now we are learning about .get func ,.set() and entry func reading/writing files wit python Entry to take input from user To use it type guy...

-
today topic is styling in tkinter Whole thing in a video styling is a basic and important roll in tkinter first make a label or button ...
-
What is Tkinter ? Tkinter is a library that is pre-installed in python used to make GUI like Calculator, Login system, Notepad etc. open...
-
This is tkinter basic tools part2. In this we learn about adding jpeg images, basic use of .pack() etc. Adding jpeg in button TYPE this...


